On surface modeling
The Problem
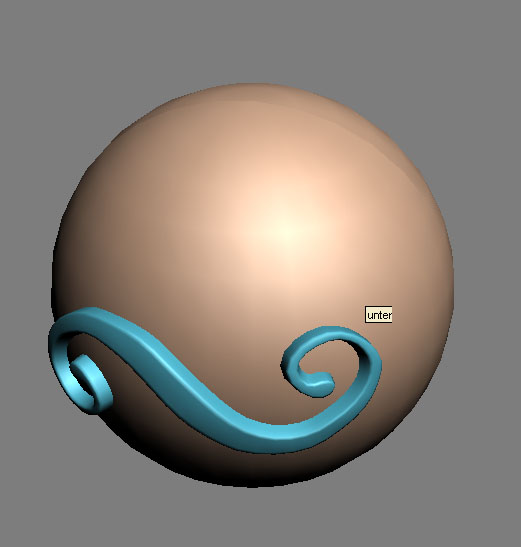
You still have a model with a more complex surface like a sphere a
nd you want to add cool details for the normal map calculation.
But it would be really annoying to create details fitting to such a
surface by moving and moving every single vertex.
The solution
By using the channel info editor, a morpher- and a skin wrap
modifier we can solve that problem.
In my example i will use a sphere to show you how it works.
First you have to unfold the model. For that you have to break
the model. Select the edges where the model will be cut (do it exactly
as you would define seems in you UV layout) and
press the „Split“ button.

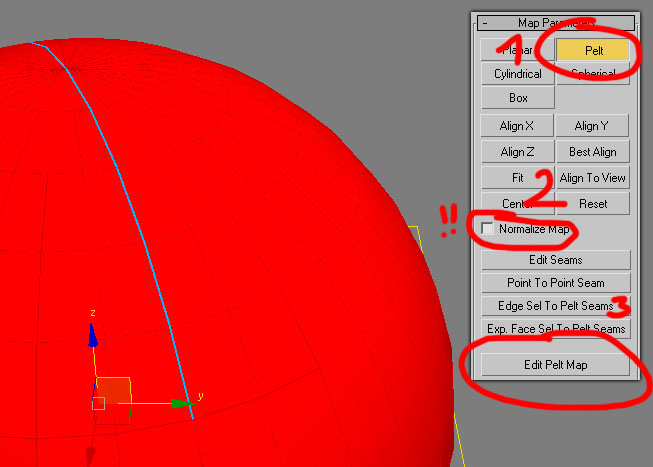
Now add a „Unwrap UVW“ modifier and unfold you model via the pelt mapping function.
For that simply select all UV faces, make sure that „Normalize Map“ is off and hit „Edit Pelt Map“.
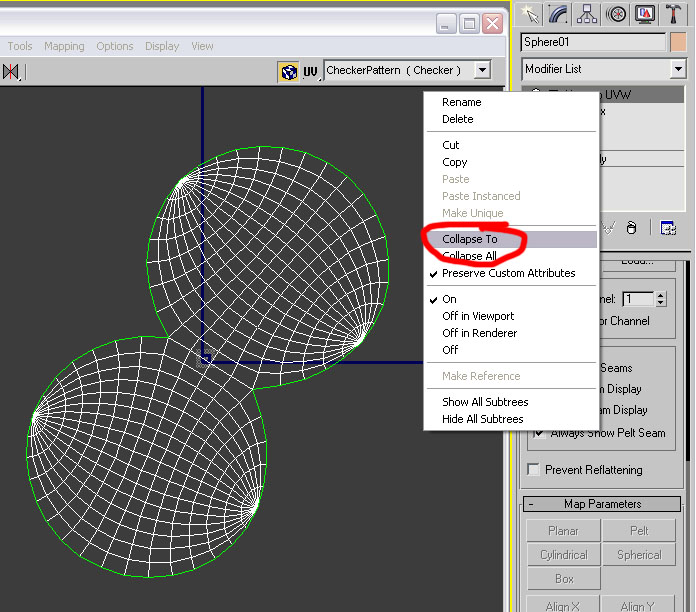
Unfold and relax the UV shell. To avoid problems we have to check the
UW / VW space. If you change the view in the UV editor to UW / VW
(via holding the mouse button down on the UV icon) you will see that
the shell is not flat. What you see is the UV shell from it's side
(like the front or left viewport) and the shell must be flat! So scale
it down until it's just a one pixel line wide shell.

That should be looks like the follwoing picture.

After that collapse the modifier stack.
After collapsing the stack make a copy of your model.
That's important because after unfolding the original mesh,
we have to fold it back – and we will do this with the copied
model and a morpher modifier.
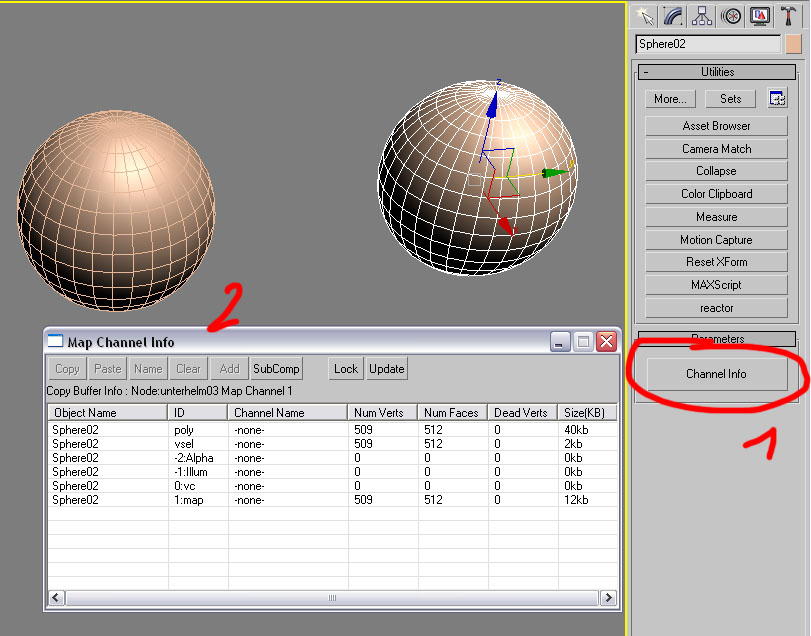
To unfold the mesh you have to open up the channel info editor.
Select the „Utilies“ tab, hit the „more“ button and select „Channel Info“.
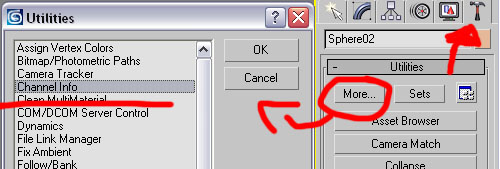
A button „Channel Info“ will appear – hit it and now you should see a
table like that one (2):
To unfold the mesh you have to copy the last line to the first. Press OK when max is ask you for a name.
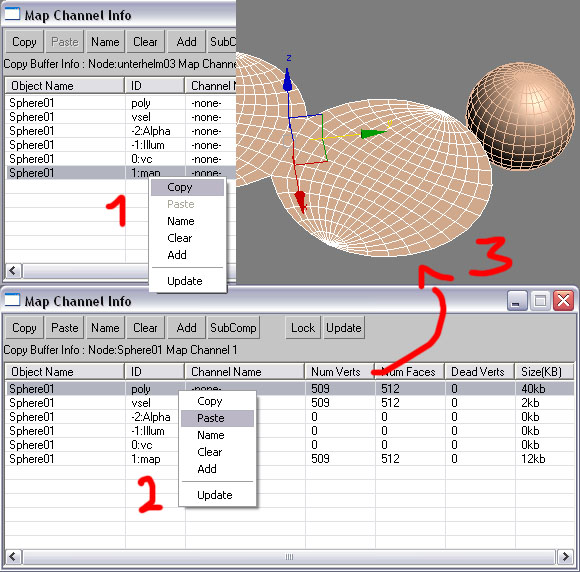
The result is a flat model. Now you can start to model your detail on the flat surface.

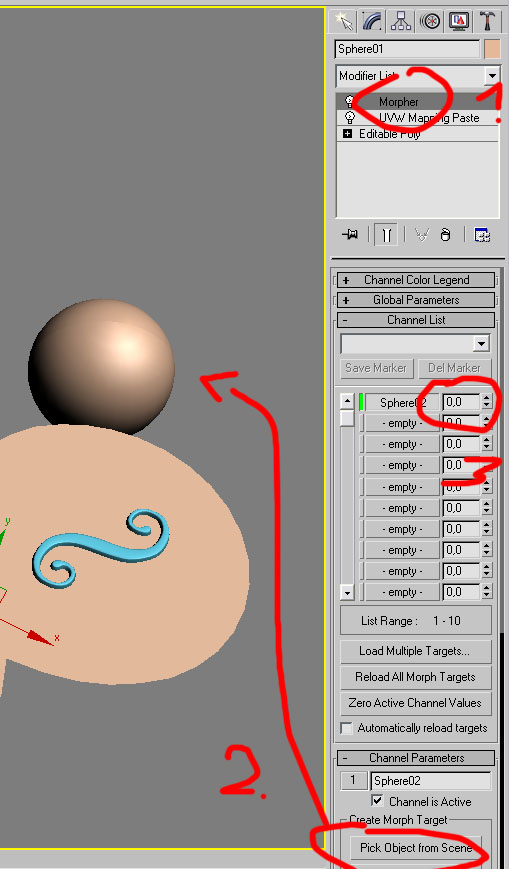
Now we have to fold the model back. For that just add a „Morpher“ modifier to the flat surface, press the „Pick Object from the
Scene“ button and select the copied sphere as a morph target object.
After that you can change the morph value by changing the textfield (3).
If you change it for example to 100 your flat surface will be
morphing to it's old form: a sphere. Change it to zero.
The last step is to bind the modelled detail to the flat surface.
For that select the detail, add a „Skin Wrap“ modifier and after
pressing the “Add“ button select the flat surface. The model is
now bound to it's parent: the flat sphere.
Now you can change the morphing value and the modelled detail
will follow the surface of the morphing sphere and should look like that: